|
The Enigmas on the Moon |
||||
|
Before you check out the anomalies that have been found, check out the background information in the notes below. You can always come back to this page for specific references... "Shuttle Rock" Copernicus Crater
Evidence
.
|
||||
|
Above Top Secret discussion forum is a place were people come together and discuss various conspiracy theories and alien phenomenon. The format is more serious than most boards and there is a low tolerance for nonsense, thereby increasing the info sharing process. The idea is a forum to present interesting and controversial ideas and discuss them in a civilized manner. On 13-9-2006 at 08:38 AM the owner of the forum
posted John Lear's Moon Pictures on ATS. From that original post of the
images that are amazingly high resolution, the search for anomalies was
on.
Pegasus is in no way affiliated with ATS, save that many members of our group are members on ATS and share ideas and meet new interested people. As a result of the work on these pages I have received much information in private e-mail that are letters of support and donors of information, some of which can be shared and some remains confidential. If you wish to participate in the active and on going discussion you can visit ATS at the threads listed below and join the conversation. There are MANY threads at ATS dealing with similar subjects, far too many to list. We therefore will add only those threads that are of importance to us for this web site Click on the ATS Logo below to take you to
the board's home page...
Page Menu
..........John Lear's Moon Pictures ..........Infrared Moon Images ..........Revealed for the First Time Color Images of the Moon from Clementine Satellite ..........Stargates are Real ..........UFO: Antigravity or Coand? Effect man made saucers or aircrafts? More threads that we are active in can be found on John Lear's Page 2) Anomalies in Photos
3) Imagery Information
4) Other Pegasus Projects
5) Email
 |
||||
|
Photo Source Information The first 4 are separate scans of one photo Lunar Orbiter 2-162H. I ordered this photo many years ago from a NASA contractor, I forget which. When the package arrived it was a 16x20 inch negative. It took until a couple of years ago to find someone in Las Vegas that could print from a 16x20 negative. I had 2 prints made, one a 16x20 print and one 20x24 which is now on my den wall. I took the 16x20 over to Bob Lazar's and he scanned it in 4 sections: no. 1 is top left, no. 2 is top right, no. 3 is bottom right and no. 4 is bottom left. No. 5 is a scan of Lunar Orbiter 5-155M. The LO-2-162H has not been retouched as far as I can tell. LO-5-155 has been retouched which is obvious from others photos I have of 155. The other photo I am referring to is published in "Exploring the Moon Through Binoculars and Small Telescopes by Ernest H. Cherrington, Jr. published in Canada by the General Publishing Co. Toronto, copyright 1969, 1984. It is on page 230 I think but I will check. LO-2-162H is an oblique photo of the north face of Copernicus looking north. I will post the technical data in the next couple of days. The Lunar Orbiter cameras were launched in 1965-1966 and 1967. There were 5 Orbiters. They sent back thousands of crystal clear photos of the moon. As I mentioned most of these photos have been retouched. Through some quirk of fate I not only received on that wasn't retouched but received the actual negative. Here is some data on the pictures: Copernicus 1 through 4 are from Lunar Orbiter 2 H-162; Spacecraft Altitude 45.9 kilometers, camera tilt 69°20; Frame Center Data: LAT.: 5°30N, LONG: 20°00W, sun elevation 24°40. Framelet Bearing: N86°40W. Lunar Orbiter 2
Copernicus 5 Lunar Orbiter 5 M155 Spacecraft Altitude 104.2 kilometers Camera tilt: 5°10 Frame Center Data: LAT.: 10°40 north, LONG: 20°20W, sun elevation 18°00 Framelet Bearing N5°10E. Lunar Orbiter 5
|
||||
|
UPDATE - Technical Data: Four of them labeled Copernicus 1 through 4 are from Lunar Orbiter 2 H-162; Spacecraft Altitude 45.9 kilometers, camera tilt 69°20; Frame Center Data: LAT.: 5°30N, LONG: 20°00W, sun elevation 24°40. Framelet Bearing: N86°40W. This first batch are the huge, best quality, full size images, if you have a dial up connection be prepared for a long download. The Images and the start of the thread discussing the
anomalies can be found at ATS
http://uploads.abovetopsecret.com/Copernicus1-full.gif
{Editors note: You can also get lower resolution copies from the ATS web site, but they are not very good for seeking anomalies} |
||||
|
Photo Source Information Lick Observatory John Lear's description of "Lick Observatory" images: These 2 pictures of the moon LICKOBS9 and LICKOBSA were sent to me by a NASA photo contractor, unrequested along with LO-II-162H and a few others that I had ordered. I have not been able to find out any information of LICKOBS9 except that it is similar to photos of the moon, taken by Lick Observatory, shown in magazines and posters. LICKOBSA Lick Observatory, 1946 January 17d 07h 51m UT phase 13.80, colongitude 82o. This plate was taken about two thirds of a day before full moon. The plate has been specially printed to avoid the extreme full moon contrast. At full moon many of the details are lost in the glare. The Images and the start of the thread discussing the
anomalies can be found at ATS
http://uploads.abovetopsecret.com/lick001-full.gif
6mb
http://uploads.abovetopsecret.com/lick002-full.gif
1.3mb
|
||||
|
Note on How the Photos Are Created
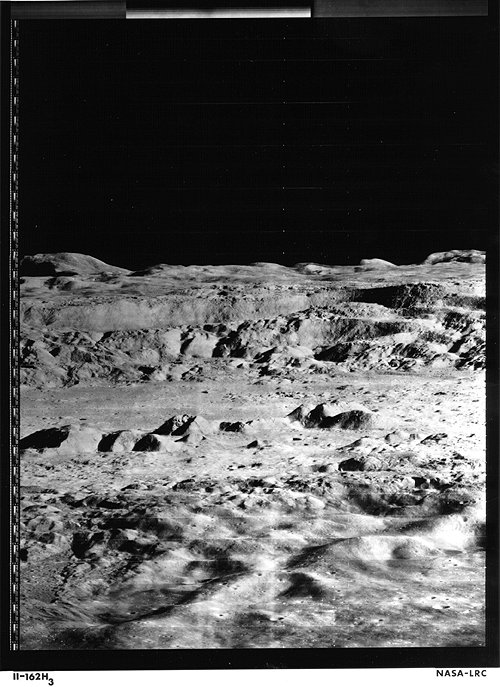
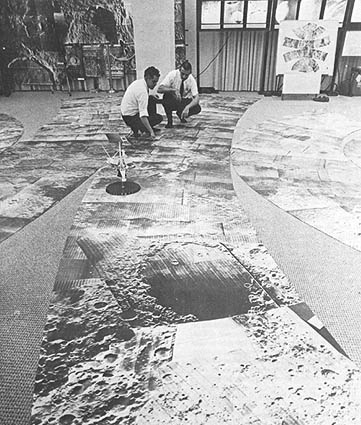
The Copernicus #1-4 that we are using are quarter sections of the topmost frame LO2_H162_3. The total area covered by C#1 to C#2 is ONE photo of the area. People have been referring to the lines in the pictures as negative lines. THIS IS FALSE... they are scan lines The Orbiters took photos that are developed on the spacecraft in a continuous 70 mm negative strip. This negative then is scanned in lines by a video camera... this video image is then sent back to Earth via radio signals to be printed. Remember that this is before digital imaging. The lines you see are the bars created by each scan of the original image and NOT a result of piecing together negatives. The strip shown here is three photos pasted together, but the area we are studying is one image before scanning. This explains why developing spots on the image have not been removed
by making a new images as the original is on the space craft. This also
explains the fact that the bottom of the image appears closer that the
top. IT IS... just like any photo taken you will see perspective of distance.
IF the image was created by small scans as the Orbiter made a pass, this
would not be the case, however that is not how these images were obtained.
This is VERY IMPORTANT when judging scale and clarity of anomalies in these
images. Below is the single frame in question.
"Lunar Orbiter 2 oblique northward view of the interior of the 100 km diameter Copernicus crater on the Moon. The central peaks are in the middle of the image, rising about 400 m above the crater floor, and stretching for about 15 km. The northern wall of the crater is in the background. This is the top frame of a set of 3 adjoining high resolution frames, which are available in image lo2_h162_123. (Lunar Orbiter 2, frame 162-H3) " - SOURCE |
||||
|
Note on The Orbiter Cameras The Image below shows how the Orbiters took images and processed the film ON BOARD, then the finished image is scanned and transmitted to earth in bars
In terms of angular measure, the MR camera had a field of view of 44.4 degrees by 38 degrees and a resolution of 34 arc seconds. The HR camera had a field of view of 20.4 degrees by 5.16 degrees and a resolution of 4.4 seconds of arc. NOTE: The resolutions for both cameras were quoted for a 3 to 1 contrast ratio. The resolution is presumably somewhat higher at higher contrast ratios and lower at lower ratios than the values quoted. Film density readout was accomplished by a high intensity light beam focused to a 6.5 micron diameter spot on the spacecraft film. The spot scanner swept 2.67 mm in the long dimension of the spacecraft film. This process was repeated 286 times for each millimeter of film scanned. The raster was composed of 2.67- by 65 mm scan lines along the film. The video signal received at the ground station was recorded on magnetic tape and also fed to Ground Reconstruction Equipment (GRE), which reproduced the portion of the image contained in one raster on a 35 mm film positive framelet. Over 26 framelets were required for a complete MR photograph and 86 for a complete HR image. Of the 211 simultaneous exposures, 209 MR and 202 HR were completely read out. The loss of two frames was due to the failure of the traveling wave tube amplifier during final readout operations. All recovered photography is considered usable. Experiment performance was nominal until the final readout on December 7, 1966. A detailed description of the experiment, a bibliography, and indexes of all the available Lunar Orbiter 1 through 5 photos are contained in the report 'Lunar Orbiter photographic Data,' NSSDC 69-05, June 1969. - SOURCE Important Update March 01, 2007 We have found the secure web site of the company that made the cameras and the have a historical document describing the camera and the resolution possible. Unfortunately for us those images will not be available for us to see as they are under the US Department of Defense. Here is a significant quote on the resolution: "On a typical Lunar Orbiter mission, the photographic system provided high resolution pictures of 4,000 square miles of the Moon's surface with enough clarity to show objects the size of a card table. At the same time, medium resolution photographs covering 20,000 square miles could be made with overlap for stereo viewing and analysis of surface topography. " Important Update April 18, 2007
|
||||
|
Note on Enhancement These pictures are in .GIF format. If you take a section and enlarge it, the result will be pixel enlargement, so you will gain no more resolution than before. As the pixels become larger, detail drops dramatically. Best procedure: Crop the area you are interested in, than convert it to 16 million color format {Jpeg, psp, tiff, adobe} THEN increase the size. This conversion will resample the image data to give you a more accurate visual. A faint colonization acts like a filter and helps you see the contrast better. Different colors work differently for people so try a range that worked for you. Always keep two copies, the original gray and the colorized. Viewing them size by side you will spot anomalies better. Slight changes in contrast or gamma settings is okay too. Just remember too much "enhancement" ruins the intent, but it is a useful spotting tool. My Screen resolution is set to 800x600 on a 19 inch monitor.
|
||||
|
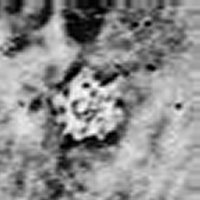
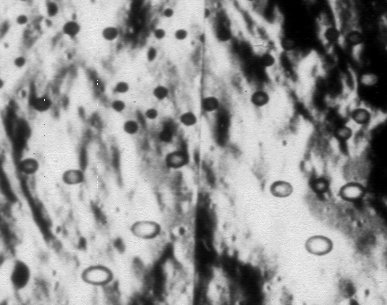
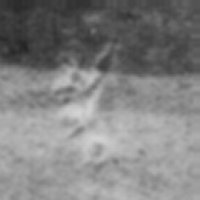
Note on Shadows Much has been said about the play of light on the eyes that make shadows appear as something else. Just like people can see strange objects in clouds, so it is with rock faces and shadows. However the shadows included here are the ones that are obvious, and have been captured on film. And odd shadows generally require something to MAKE that shadow. The challenge offered here is to locate the source of these strange shadows... There are shadows/dark areas that are square, and one that is a large sharply defined cross. No meteorite strike would make such craters, so they are very good anomalies to consider. Below are two images, the first is a normal crater, the second is an anomaly labeled "Tank A" They are presented here to illustrated the lighting on these images. The sunlight effectively comes from the right hand side in C#1 thru C#4. C#5 has to be rotated 90 degrees to the right to match the crater orientation of the other four, then it too has the sunlight from the right. Notice the crater.. the shadow is to the left of the rim. The sunlight
strikes on the left wall of the crate, the right side is in the dark. On
the tank the "object is in the sunlight, with the shadow cast to the left.
This is a good way to help discern artifacts from natural occurrences,
I.E. is it a hole, or a raised object.
|
||||
|
Note on Fiducial Marks What are those little cross hairs in Apollo photographs? The technical term is a FIDUCIAL .They are etched onto a sheet of glass , known as a RESEAU PLATE. Excerpt "The lunar surface Hasselblad cameras were fitted with a device called a reseau plate. The reseau plate is a clear glass plate on which is etched small black cross hairs, called "fiducials" by some and "reticles" by others. As each film frame is drawn into place, it is pressed against the reseau plate so that the picture is taken through the plate. This results in an image of the fiducials being superimposed over the image focused through the lens. A reseau grid is used in the science of photogrammetry to establish a geometrical basis for measuring objects in photographs. It can be used to correct for any misalignment of the film in the camera, or distortions in the image after development or electronic scanning. Since the location of the marks on the reseau plate is known with great precision, correcting for distortion is a simple matter of manipulating the image until the marks are in the correct location." |
||||
|
Note on Anomalies There are four types of Anomalies present in these photos. The first three are included so they may be eliminated from the true search, as most people will spot these right away and thus be distracted from further search. By identifying them for what they are, they can be put aside, no matter how much fun they make be. One further note of importance is that these photos are digital transmissions from a Lunar Orbiter that IS NOT returning home with photos. The data is processed and printed on Earth in a lab then assembled, then the overall image is re photographed and reprinted as a whole. From reading some posts in threads it seems people forget that the image are digitally transferred first. Type #1 These include but are not limited to; dust and fibers on the negatives,
prints and scanners, glitches in the film {usually repetitive}, development
spots {water drops}, and paper watermarks {faint ghostly faces, symbols
and letters}. Some of these have been identified in the pages that follow.
More will be added later.
Type #2 These are the fun ones. The "It looks like..." These are usually large, look like faces or other objects like the shuttle at the top of this page. These are tricks of light and shadow and perception, whether you see the dark patches or the light patches. Type #3 The shadows. Not like the ones above, these are strange shadows that appear to have no object to cast such a shadow. These are more interesting and can be true anomalies at times, so are worth exploring. Type #4 The true anomalies. These are small!! They all fit within a 1/4 inch square and require enhancement to spot them, though some are a lot clearer than others once you locate them. To grasp the size, see "Notes on Scale" below. It is also very important to note that since the premise is that the crater represents a mining operation, using logical approaches as to position of such equipment relating to a mine hypothesis makes it easier in deciding where to look. |
||||
|
Note on Scale COPERNICUS crater
If the depth of Copernicus was 12,500 feet and you measured from the floor to the approximate top of the rim on a photo of Copernicus and got approximately 80 millimeters and then divided 12,500 feet by 80 millimeters to find out the approximate height of 1 millimeter and got 156.25 feet and then you measured the height of the building in millimeters and got approximately 2 millimeters and then multiplied that 156.25 and got 312.5 feet then by rough calculation you could hypothesize that the height of the building on the rim of the crater Copernicus was roughly 312.5 feet high. If you assumed an error factor of 25% the building could be as small as 234.375 feet high or the approximate height of a 23 story building. Roughly. - John Lear |
||||
|
Note on Film Quality Many people are under the mistaken impression that film quality in the 60's was not that great. This is far from the truth. While the film the public used may fit that category, not so the Military. Back in my school days in the photography class we had some black and white film called H&W Control Film that produce negatives with no grain. This was used for aerial reconnaissance, but was released to the public as they had a better one. This film was available to the public in the late 60's early 70's. I used the film and developer for approximately 10 years for close up and some macro work. at one time in the 70s I was considered to be some sort of expert in the use of the film and developer. It is to bad it is no longer around. one of the techniques you could use was called still development. that process produced negatives with no grain. I have projected a 12x18 mm neg. to approximately 1x1.3 m feet on the wall, and made a print of a part of the image, and even at that magnification, grain does not degrade the image.I myself have a sample left of a fellow photographer at a football game. The image was taken without a telephoto lens across the football stadium. Later in the lab I created an 8x10 image of just her face, and it comes out very clear and sharp. To get that image it was required to project the negative onto the wall the entire length of the darkroom, but the results were amazing. Though the film was rated 100 ASA, we did experiment with nighttime shots, pushing the speed to 1600, still with no visible grain. |
||||
|
Note on Distance Copernicus 1 through 4 are from Lunar Orbiter 2 H-162; Spacecraft Altitude 45.9 above the surface. The camera tilt 69°20... This means that effectively the distance from the lens to the object is roughly 138 kilometers. On Earth, such a distance would not allow for a lot of minute detail, however on the Moon that is a different story. Since there is very little atmosphere on the Moon there is little interference with a reflected light ray. There is no deflection, diffusion or dilution of any light coming off the object and hitting the camera lens. Proof of this is the amazing detail of the Hubble Space telescope images of objects billions of light years from Earth. Same rule applies... light in a vacuum travels forever until blocked or bent by magnetic fields. What this means for us is that seeing small detailed anomalies should not be a problem. The fact that some areas do show a little "fuzziness" is further evidence that there is a least a slight atmosphere on the Moon |
||||
|
Note on John Lear "John Lear, a captain for a major US Airline has flown over 160 different types of aircraft in over 50 different countries. He holds 17 world speed record in the Lear Jet and is the only pilot ever to hold every airline certificate issued by the Federal Aviation Administration. Mr. Lear has flown missions worldwide for the CIA and other government agencies. A former Nevada State Senator candidate, he is the son of William P. Lear, designer of the Lear Jet executive airplane, the 8-track stereo, and founder of Lear Siegler Corporation. Lear became interested in the subject of UFO's 13 months ago after talking with United States Air Force Personnel who had witnessed a UFO landing at Bentwaters AFB, near London, England, and three small aliens walking up to the Wing Commander. |
||||
|
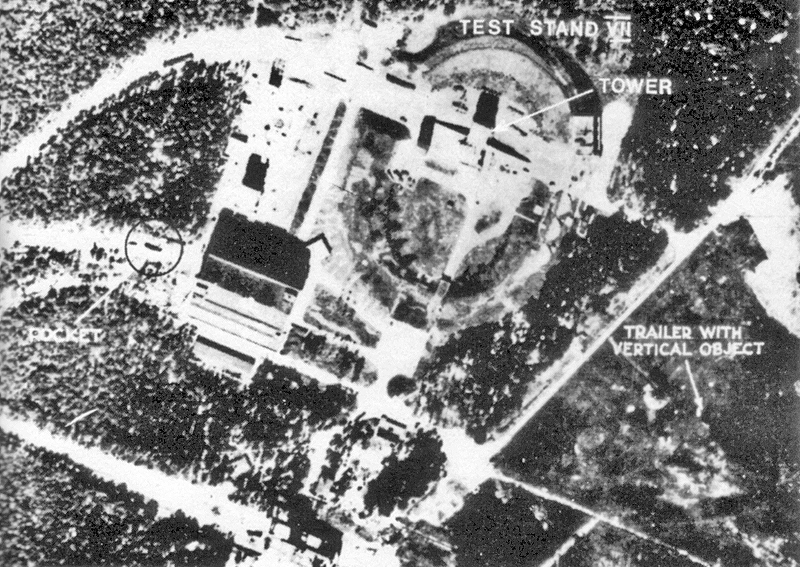
Note on Image Recognition .
Any discussion on finding anomalies usually brings the skeptics out saying "they see nothing" in those low resolutiom images that we present. The above image was taken by the British RAF over Peenemunde in Germany during World War II. The rocket launch platform is obvious, but pay attention the the two objects labeled "rocket" and "trailer". These images were good enough fortrained imagery experts in the RAF to plan bombing missions... The images we hae to work with are much better resolution, and do not require the same level of expertise to identify objects as the sample above indicates. |
||||
|
|
||||
| Copyright Notice
All pictures and photos on this page, unless otherwise noted, have been gathered from public domain sources or are available under GNU License. Further documentation is available on our Copyright Page and our Legal Department. Article Quotes all have links to their appropriate source and are noted. All other text not so noted is available under the terms of the GNU Free Documentation License All information on this page is used only for non profit educational purposes. All reasonable attempts have been made that no credits are missed, but with a work of this size omissions may occur. If you see anything of yours that has not been properly credited or wish to have removed please contact the Webmaster |